Warranty
Warranty Processing for Soluna Mattress & Furniture
To help resolve warranty claims quickly and fairly, Soluna Mattress & Furniture follows a structured process based on manufacturer requirements. While we support you through the process, final decisions are made by the mattress manufacturer, not by Soluna.
Procedure and Checklist
-
Goal
To assist you in processing a warranty claim on a mattress purchased from Soluna Mattress & Furniture.
-
Purpose
The purpose of this procedure is to expedite the warranty claim process and give you all the tools needed to process your claim with the manufacturer.
-
Next Steps
Warranty processing can vary depending on the manufacturer. Keep in mind, Soluna Mattress & Furniture did not make your mattress, final determination is at the discretion of the manufacturers guidelines. Upon submission of these items we will be able to provide guideance on length of time to resolve the issue.
Please note that mattresses that are stained, soiled, or not supported by an approved foundation, box spring, or frame are typically not eligible for warranty coverage. In some cases, alternative solutions—like a new frame, foundation, or additional underbed support—may help address the issue.
Our goal is always to help you find a fair and reasonable resolution. To begin the warranty process, all required items must be submitted along with clear, labeled digital photos as outlined below. We’re unable to move forward with warranty processing until all requested materials are received.
Please email your warranty request and photos to us. If you prefer that we assist with gathering this information in your home, a $100 processing fee will apply.
Procedures for all mattresses, regardless of type.
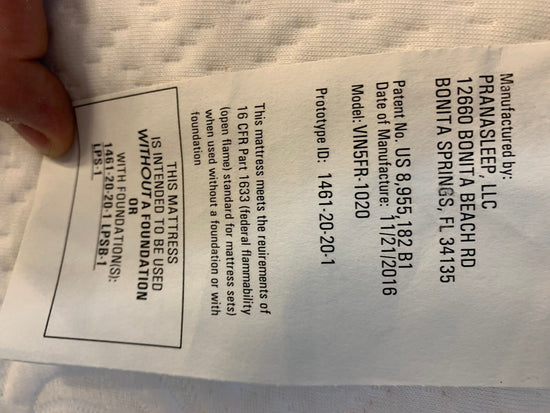
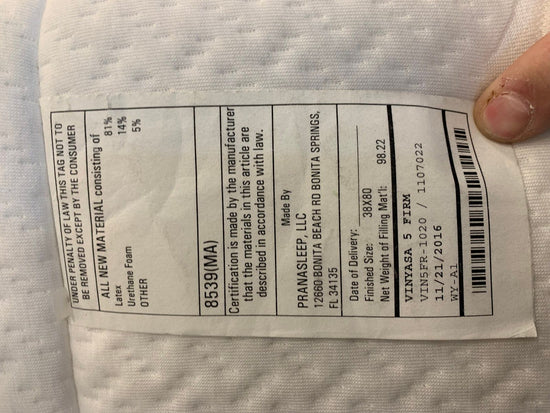
Step 1 -Picture of your law tag
Please take a clear, well-framed photo of the law tag, typically located at the head of your mattress. If there are two tags (one behind the other), be sure to photograph both. If you also purchased a foundation or box spring from Gardner’s, include similar photos of the law tag on that item as well.
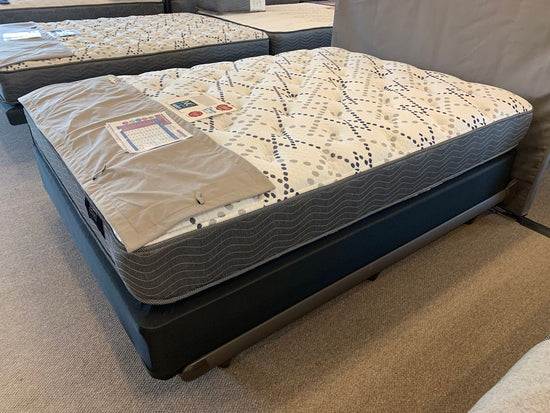
Step 2 - Picture of your mattress
Take a photo of your mattress or mattress set as it is currently positioned on your bed frame or furniture—whether it’s a platform bed, wooden or metal frame, or directly on the floor.
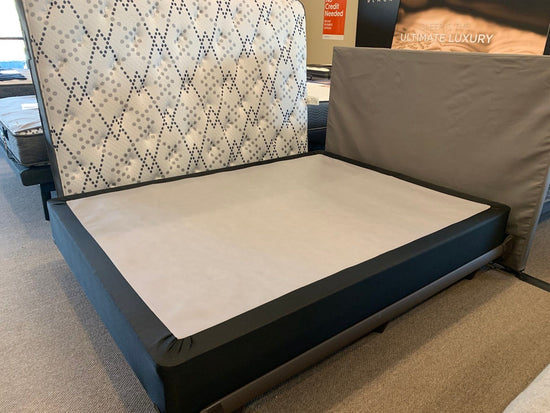
Step 2 B - Picture of your foundation
Take a similar photo showing only the foundation or box spring as it rests on your bed frame or furniture—whether it's a platform bed, wood or metal frame, or placed directly on the floor.
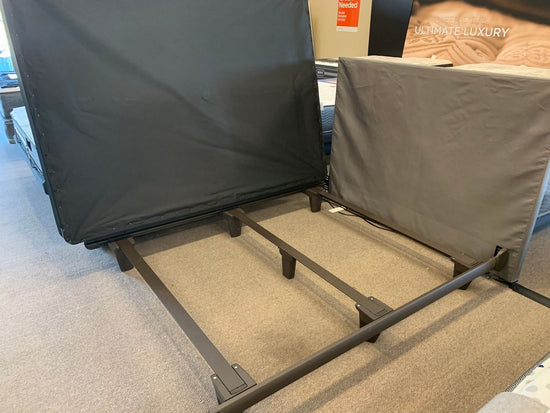
Step 3 - Remove your mattress
Remove the mattress and foundation or box spring (if applicable), and take a photo of the bed frame or support system underneath where the mattress or set rests.
Step 4 - Assess damaged area
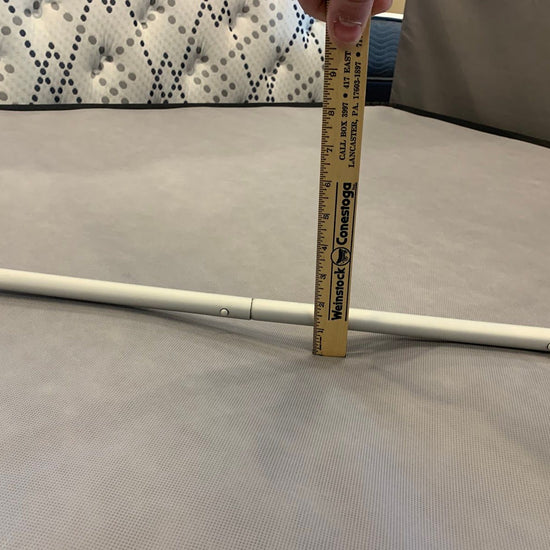
If you have a foundation or box spring, place it back on your frame or furniture. Then, lay a straight edge (such as a broom handle or yardstick) across the area where you notice an issue while lying on the mattress. Without applying pressure, measure the deepest point of the dip and take the following three photos:
- One photo from the right side of the foundation/box spring
- One photo from the left side
- One photo clearly showing the low point detected when the straight edge is placed across the affected area
IMPORTANT: All photos must clearly show the measurement depth, as demonstrated in the example images.
Step 5 - Measure the lowest point
Place your mattress back on the foundation, box spring, or furniture it normally rests on. Then, position a straight edge (such as a broom handle or yardstick) across the area where you believe there’s an issue. Without applying pressure, measure the deepest point and take a clear photo of the measurement as shown in the example.
Visual Aids on How to Submit Warranty Claim
-
Step 1
-
Step 1
-
Step 2
-
Step 2
-
Step 3
-

Step 3
-
Step 4


